Showing posts with label For the Love of Beef. Show all posts

Thursday, August 18, 2011

My Best Ever Steak - Yum!

Steak is something that I think ever single male begins their cooking journeys with.   Despite the fact that we start with it the fact remain that getting it right it actually something you have to spend a lot of time working on!

Steak is quite the obsession of mine and I have tried lots of different things.    In these trials I have begun to lock into a formula for success.   My formula is quite simple:

Good Ingredients + Time + Accuracy + Patience = YUM


So why don't I talk about the ingredients first....

1 Dry Aged Steak Sirloin Cut (Dry Aged = FLAVOR and is WORTH the cash)
Black Truffle Infused Olive Oil
Butter (The fat of the gods)
Garlic Powder
Salt
Black Pepper
Soy Sauce

One of my first steps is the rub.   I use a very simple rub that is garlic powder, black pepper and a pinch of salt per side.  I rub down the steak in this and then move it to the refrigerator.   This is where TIME really becomes important.   I like to leave my steak in the frig for about an hour and then take it out of the frig one hour before I cook it to allow it to come to room temperature.   Rushing this step of it will only result in a sub-premium product.  DONT RUSH THIS!!!!!

I then move to making a savory fat mix.   I melt some butter about half a stick and combine it with 2 tablespoons of truffle oil and one tablespoon of soy sauce.    The more premium soy sauce the better the flavor.   I use a black aged soy sauce.

I set my oven to 400 degrees and then get a skillet heated to medium high.  Once the pan is nice and hot i toss in the fat mix after giving the steak one quick coating of it.  It will start to bubble and spit and be ready for a little smoke to come up.

I then toss the steak in the pan with the bubbling hot fat mix and let it sit on one side to achieve the perfect sear.  The sear is a very step.  It helps keeps the steaks juices in but also really makes your steak look BEAUTIFUL.   Eating is about all senses.   Don't neglect beautification!  Also don't always check your steak!  Let it sit for 5-6 minutes and get that sear.   Patience and time are your friends.

While working to achieve the perfect sear I tilt the pan and get some of the bubbly fat spooned onto the top of the steak.   Once the sear is right on the bottom side  I flip the steak an then move the pan to the oven.

Now how long you leave your steak in the oven is all about how you like your steak cooked.   I like Medium to medium well so depending on the size of the steak I leave it in their for 8-12 minutes.   Size matters in how long you leave it.   I use my tongs to check how "firm" the steak is by pressing into it and that always help me really nail the time perfectly.

Once you are happy with how long its been in the oven take the steak out and let it rest for 5 minutes and let the fats redistribute themselves throughout the meat.  Slice the steak and make sure you are working with the grain of the meat and not against it.   Once the steak is sliced hit it with a slight pinch of salt to button up all the flavors and VOILA!

The soy sauce and truffle oil bring a earthy umaminess to the steak.   The garlic is straight savory and the meat stands on it's own.   Nothing over powers and they all work to make it beefy beefy goodness.   I call this steak recipe my bubble gum steak recipe because if they made steak flavored bubble gum I would want it to taste like this :)


Here are some of the pics:


Steak Cooking

Steak Cooked

Steak Sliced #1

Steak Sliced #2


YUM YUM STEAK!

Monday, May 16, 2011

Lime Cilantro Skirt Steak with Beefy Polenta, Baby Bok Choy and a Blue Cheese Sauce

I was trying to determine what to cook at home tonight as I have been getting lazy with my cooking due to some increased need for focus at work.  Its always the day job that hinders my pursuit of being a chef! 

So I wanted to do something really BIG.  I mean something BIG in flavor that makes the eater giggle with levels of flavor as they work across their palette.  

I have been really craving some skirt steak lately as they are so very easy to make and so darn flavorful.   Skirt steak is one of those meats that you can flavor so amazingly as it is so thin and really takes on whatever you throw at it.  A wonderful steak to cook with!.  

I decided to flavor the skirt steak first by marinating it in a lime and olive oil marinade that I put a tiny bit of salt in to bind the flavors.   I let the meat sit for a little bit and really soak in that limey goodness.   I then made a quick rub by combining together 2 tea spoons of lime zest, about 25 pepper corns, salt and a handful of cilantro with a little bit of olive oil.   I combined it all together in a mortar and pestle to really get the flavors together. 

I wanted to serve it with something that was nice and silky so I landed on the idea of serving it with a nice bed of beef both based polenta.  Now polenta is made by adding in polenta mix with broth and some cheese.   The cheese is usually a parmesan cheese but I wanted to think of a cheese that is really more flavor that works with the beef.   I decided to replace the cheese with some heavy cream to bring in the creaminess the cheese work bring so I can find a more interesting way to use the cheese flavor.

What cheesy goodness goes well with beef?   hmmmmmm.......

As soon as I asked myself the heavens opened up and an heavenly voice became clear to me as the angels of the cheese gods professed "Blllluuueeee CHeeeeeeessssseeee"

Holla blue cheese and steak is absurdly wonderful!   Thanks cheese gods! 

My mission was clear make a wonderful BIG blue cheese sauce with a hunk of premium blue cheese and some heavy cream to thin it out and cream it up. 

Now all I needed was to balance it with a little bitterness and sweetness so I grilled up some baby bok choy.

What did I get?!?????

PURE DELICIOUSNESS!  BIG BOLD WONDERFUL LIMEY CHEESY STEAKY BEEFY CREAMY GOOD LAWD OF MERCY GOODNESS


YUM YUM YUM

Saturday, April 30, 2011

A Bright and Simply Delicious Steak and Eggs

I arrived home early this morning, flying in around 130am.   I was so excited to be home.   To walk into the paradise known as home was such a wonderful idea to me.   It became almost aspirational. 

So this morning I wanted to bless my home with a wonderful breakfast that was bright and reminded us of what we have. 

Herbs and acidity are the key to brightness so I decided to built around cilantro and lime. 

I started by toasting some spices.   Yellow mustard seed and black peppercorns.  I tossed in some brown sugar which will give my rub some caramelization.   At the same time I put a nice clove of garlic in the mortar and pestle and got it all mashed up.   I tossed in the spices once they started crackling and got the rub all mashed up. 

I rubbed down the skirt steak with my fresh rub and then let the steak sit.   I chopped up some fresh cilantro and rubbed the steak down with after squeezing fresh lime juice all over the steak.  I finished it with a coating of olive oil to make sure it gets hot hot hot. 

I scrambled together 4 eggs with a little milk, coarse sea salt, and cracked black peppercorns.  Put my pan on medium heat and added some butter.  Poured the eggs out and finished them with some freshly chopped chives.  I grilled the skirt steak along with some freshly slices baguette.

What did I get?

The most bright and light steak and eggs I have ever had.   Wonderfully delicious!

A pic of the rub

Here is a couple of pics of the final product


Sunday, April 17, 2011

Green Chili Cheeseburger with Quesa Fresca, Blue Corn Chips and Pickled Onions

In my quest to make the perfect burger I have been playing with green chili cheeseburger.   I was watching cooking channel and saw Bobby Flay make a green chili cheeseburger,   He included a quick pickled onion and blue corn tortilla chip.

I wanted to make my standard green chili cheeseburger and add the new ingredients one at a time to understand what each is contributing to the overall burger experience.

Lets talk about my green chili cheeseburgers for a second and talk about how I put them together.

Lets start with the meat.   I am a firm believer that you do not need to do anything to the right burger meat outside of quality 80/20 chopped beef.   Sprinkle each side with a healthy hit of salt and pepper to season them and then thats it.  Throw the burgers on a skillet to sear in the fat and you are good to go.

The next component is my cheese.   I use a quesa fresca which I chop up and toss in a sauce pan with heavy cream and a crumbled up saltine.

Next up are the chilis.  I take a nice selection of chilis: jalapenos, poblanos, anaheim and serrano.   I fire roast them and then smoke them.   You scrape out the seeds and veins and what you get is pure deliciousness.


I crumbled up some blue corn tortilla chips and plated the whole thing.   Here is the first pic:


So for starters the beef was delicious and amazing.   The peppers are smokey smokey goodness.   The cheese was salty creamy wonderful and the blue corn tortilla chip gave it a wonderful crunch.   I love it!

Ok now it is time to try again but this time with the pickled onions.  I put vinegar, a chili, peppercorns, garlic and bay leaves in a pot and brought it to a boil.


Now quick pickles are easy as pie to make.   Chop up the onions, dump them in the boiling pickle mix for like a minute or two and then pull it off the heat.    Let it sit for a bit.   Take the onions out and let them cool in your fridge.  They will have a nice bite, amazing flavor and will punch up any dish!

I used the same burger assembly but this time topped it off with the quick pickles.   What did I get?  AN AMAZING burger.  Salty, spicy, rich, smokey, and delicious!  Thanks Bobby Flay for the idea!

Saturday, March 5, 2011

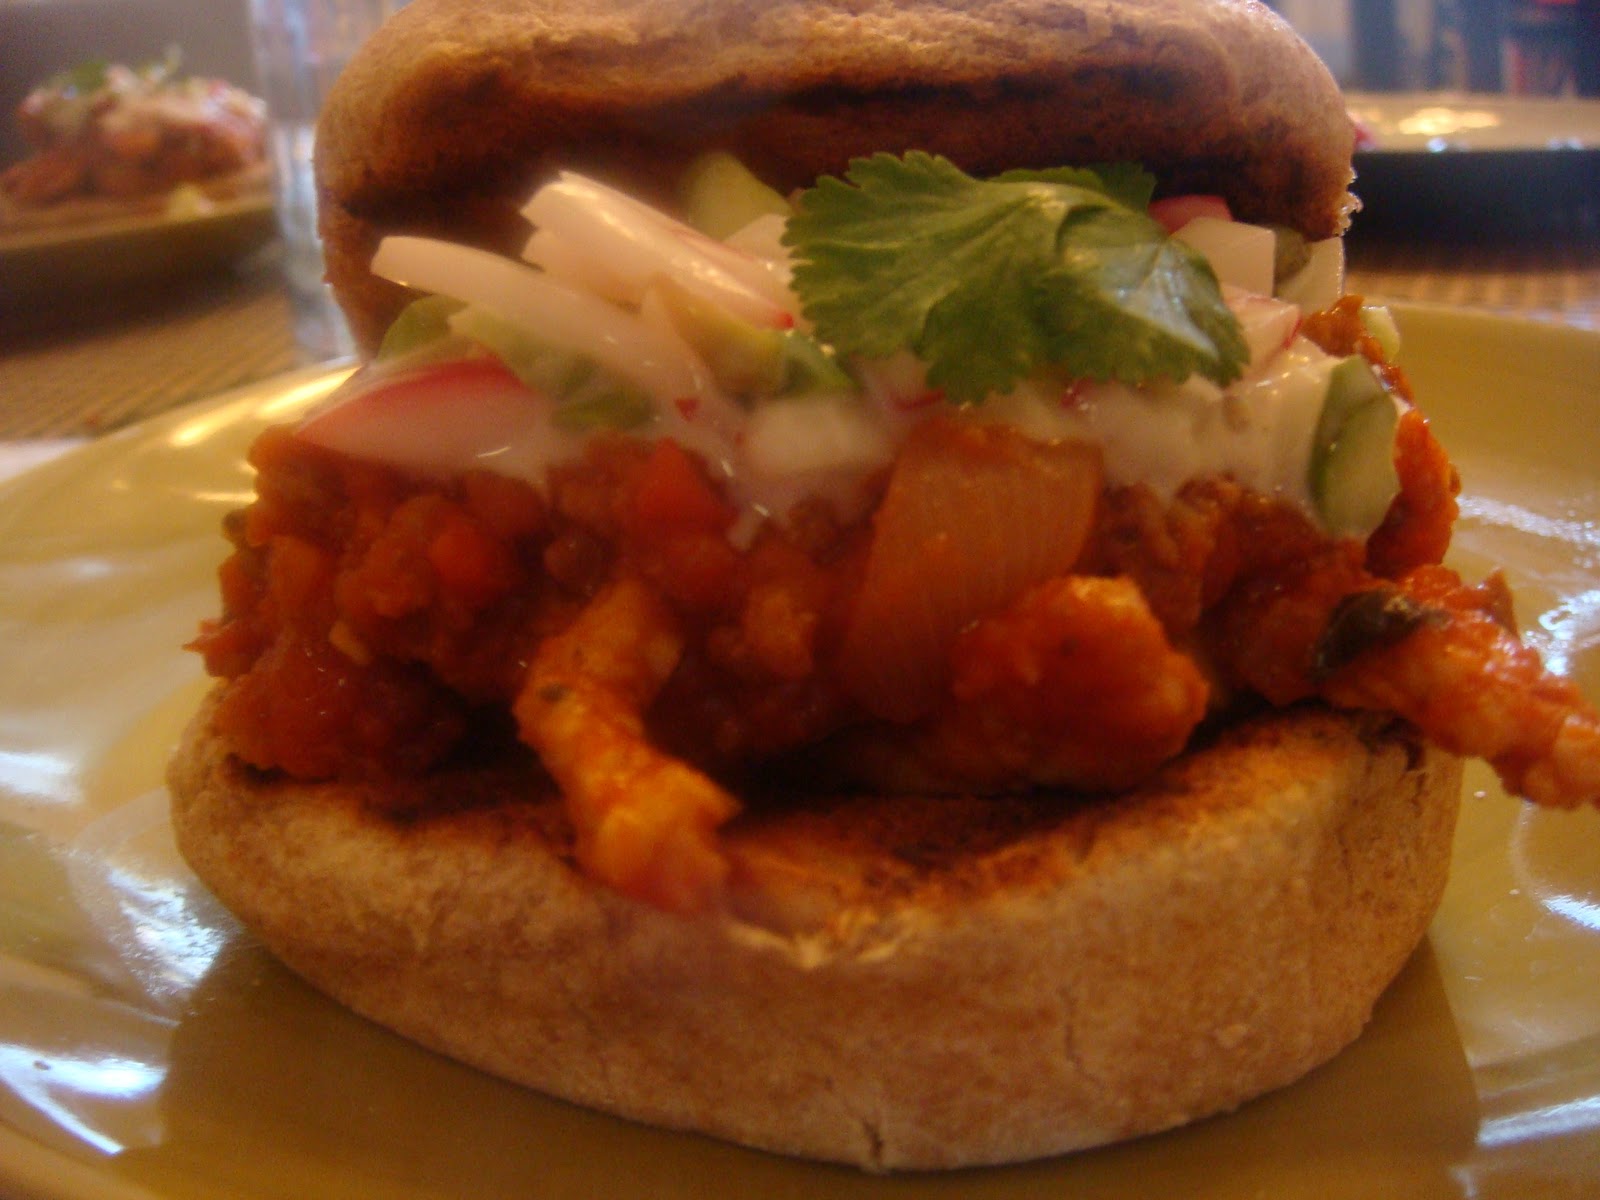
Tasty Chili & Seasoned Pork Sandwich

On superbowl sunday I made a GIANT bucket of chili and to be honest half of it is still up in my freezer :)

So the other day we noticed we had three tiny thin cut pork chops.   I figured if I paprika and pepper the pork I can quick sautee it and then toss the heated of chili on top.

I finished it off with a radish and fine chopped asparagus slaw to add a bit of crunch.

Simple food that was frankly all about clearing out some room in my frig :)


YUM YUM LEFTOVERS

Sunday, January 23, 2011

Operation Pastrmi - A Quicker and Easier but Still Damn Tasty and Tender Version

During the holidays I had the pleasure of making the meat for everyone.    As anyone who reads this blog should know PERNIL was on the menu.    It's the 2nd dish back in the picture to the left.   However I also endeavored to make another favorite meat that I have been practicing.   I call it my "Quicker and Easier but Still Damn Tasty and Tender Pastrami."   Its the first plat of meat in this picture.

Pastrami takes commitment and dedication but I PROMISE YOU it is SO WORTH IT!!!!

When you take your pastrami out of your smoker and cut the first slice you will KNOW it was worth it.   So friggin delicious

YUM YUM PASTRAMI

Ok on to the recipe

First pick up a large piece of brisket.   Generally a 7-11 lb brisket will do.   Your first step is to trim down the fat a bit.    Just remove the big nasty bits but make sure you leave some on.   The reality is fat = flavor.  However too much also = grissle.  Not so yum.   Strike the right balance with your knife.   This part is all about experience!

Ok next step onto the brine!   To make a pastrami brine is quite simple.   To be honest it is just a pickling brine that you like with some bay leaves, black pepper seeds, mustard seeds and coriander seeds to get that quintessential pastrami flavor.

Here is my brine recipe:

8 quarts of water
2 cups of kosher salt
1 elephant garlic blub sliced down the middle horizontally
10 coriander seeds
10 black pepper seeds
10 mustard seeds
(toast all the seeds first so they really release their oils)
16 bay leaves

Mix it all up with a big wooden spoon and whamo.  Drop the meat in.   Cover it up.  Keep it cold.   I stuck this brine with brisket into a freezer bag and the stuck the freezer bag into a cooler with ice and closed it all up.

Now comes the waiting bit.   Leave it alone for 5 days.    Let the brine work its magic.   Salt water makes meat go through a transformation so let it work its magic!   Alton Brown once explained the process on his show Good Eats and I forgot exactly what happens here but its magic.   MAGIC I TELL YOU!!!!!!

Oh yeah...Check that the ice is ever present in the cooler.   The last thing you want is to find out the cooler didnt keep it cool 5 days in and you have a bag o rotten meat.  Not chill.

Ok so now you have waited 5 days and you have your Pastrami brisket well brined.     You need to now make the spice coating.   This is the most laborious part of the pastrami making.    You need the following:

1 bottle of black pepper corn seeds
1 bottle of coriander seeds
1 bottle of yellow mustard seeds

Make sure all the bottles are the same size.  You need equal parts.   Get out your mortar and pestle and get ready for the not so fun part.   You need to crack all the seeds with the mortar and pestle.  Your arm will be hurting after you finish but I promise you it will be worth it.    Get it all cracked up and put down on something you can fit the meat into for coating it.   Here is what my setup looked like


Once this is ready take your meat out of the brine and just dry it.  You need to now take the meat and coat it with the spices and when I say coat it I mean coat it.    Just press the meat into the spices and flip over and press again.    Keep flipping about 10 times and pressing the meat into the spices.    Your meat should look like this when you are done:


At this point it is time to friggin celebrate.   You get to look down at your meat and it is beginning to look alot like pastrami! YUM YUM PASTRAMI.

Get your pastrami in your indoor hot smoker.    I use a "Emeril" brand smoker.    It was 79.99 and gets the job done!   It even came with 4 different types of wood chips!  Thank Emeril!

Get the smoker smoking then put it in the over at 200 degrees to keep it smoking.   Leave it in their for about 45 mins per lb.    You will know its ready when the meat hits about 165 degrees.   This is about 45 mins per lb.   Check it 4-5 hours in and make sure it is smoking nicely.   If you need to add more chips and get the smoke going again then get er done so the meat is tasty.

Here is what the delicious finished product looked like:


Slice your meat along the grain of the meat so it is edible.  It is brisket so this is the most imporatant step otherwise it is FAR TOO TOUGH TO EAT!

When you are done.   Grab some rye bread, slather oen side with french dressing, drop some swiss cheese on it and toast it in the broiler.   Drop the pastrami on top and WHAMO!

YUM YUM PASTRAMI!

A Quicker and Easier but Still Damn Tasty and Tender Pastrami courtesy of Munchies and Media :)

Friday, December 31, 2010

Operation Pastrami - Learning how to make homemade pastrami

Pastrami has always been one of my favorite foods.   Delicious meaty goodness that demands you pig out with it when you dance with it.  

Well i have learned how to make this tasty treat and will be showing off my Pastrami from this Christmas later this weekend.  This is a pic of one of my practice Pastramis

YUM YUM PASTRAMI

Saturday, December 11, 2010

Dry Aged Steak with Steamed Baby Cauliflower and Grilled Japanese Eggplant

Tonight I decided it was time for steak.  When visiting my local grocer Union Market I saw that their 21 day dry aged steak was out of the hole and ready to be bought. 

I can never say no to a 21 day dry aged steak...NEVER....

I also noticed that they had some beautiful baby cauliflower and japanese eggplant at the Union Market.   Much like the steak my power to resist their gravitational forces into my belly were little to none.   So it was set...a delicious steak and some delicious veg to make saturday night YUM
I drenched the steak in black truffle infused olive oil and then gave it a healthy coating of sea salt and cracked black pepper.    I always like to let my steaks sit out until they hit a nice room temperature.   It gives the oil and seasoning a chance to sink in and flavor the meat and more so it gives you something to drool at while you are getting everything else ready.

I microwaved 4 tablespoons of butter to melt it down and added a table spoon of soy sauce and a tablespoon of black truffle infused olive oil.   I call this my bubble gum sauce.    I used it to drench the meat as it is in the broiler and it makes you wish you had bubble gum that tastes like your steak :)
 

I heated up my stove top grill to make it hot hot hot.   I tossed the steak on it to give it a nice crust on the outside and make nice deep grill marks on the steak.    I cut the japanese eggplant in half length wise and put olive oil, sea salt and cracked black pepper on the eggplant.    I set the back half of the grill on medium to high heat and tossed the eggplant on it.    I put the cauliflower in a steamer with olive oil, sea salt and cracked black pepper on it and let it steam.    Once each side of the steak had beautiful grill marks I tossed it into the broiler.    I coated it in my bubble gum sauce and let it go.   I flipped it once and gave it another coating of bubble gum sauce to plus up the flavor.   I cooked it to about 140 degrees and then took it out and served it all together.  

I love Union Market for dry aging steaks and selling it.    What a tasty treat to have at your home grocer.   The baby cauliflower was unbelievably amazing.    I defintely need to cook with those suckers more often.   They are tasty and beautiful.

YUM YUM STEAK