Sunday, June 24, 2012

Nothing Says Loving Like Buttermilk Biscuits

Buttermilk Biscuits are a quintessential comfort food in the United States.   What can I possibly say about Buttermilk Biscuits that would do them justice?   They are simply delicious.   A little nugget of food that reminds you of a better a time.  A time where food mattered and feeding people was what made cooks cook.  A chance to perfect something so simple yet so complex.   A food of everyday men.  A food that I happen to adore.

Recently I have been paying more mind to learning how to make these delicious little pillows of goodness.  I have spent the last couple of months trying different buttermilk biscuit recipes.  I started with the Irma S. Rombauer recipe from her iconic cookbook "Joy of Cooking."  I mean where else would you start?  I have tried the recipes from numerous online location and of course i have tried chef Alton Brown's recipe (my favorite Food network personality).

Now I must say after trying all of the recipes I thought Alton Brown's Southern Biscuit Recipe was my favorite.  However, despite the fact that I LOVE Alton's recipe I thought there could be a few changes that would plus them up a bit.    I know he is an icon of American cooking but still....I wanted to change a few things.   If in fact he would ever read this, I would hope he doesn't get offended by my changes but appreciates them for the reasons that I give.  After all, I think my biscuit bender was kicked off after watching Alton Brown's Good Eats episode on biscuits :)

Anywho...On to the BISCUITS!

So Alton's recipe calls for the following ingredients:


2 cups flour
4 teaspoons baking powder
1/4 teaspoon baking soda
3/4 teaspoon salt
2 tablespoons butter
2 tablespoons shortening
1 cup buttermilk, chilled

Now there are a few things he has done VERY right in this recipe.  For starters the equal parts of butter and shortening.   His explanation was because the shortening give a good crumb and the butter gives a good taste.  This is 100% agree with.   I have tried all butter, all shortening, 3 parts butter & 1 part shortening, 1 part butter 3 parts shortening, lard instead of shortening etc.. etc.. etc...  He nailed it.   Equal parts butter and shortening = flavor + crumb.


The second thing Alton has done very right in this recipe is the sticky factor in the dough.   His recipe calls for a very sticky dough and then to not knead it very much.  This is absolutely the right approach.  The biscuits come out fluffy and delicious.

The last thing he explains that is VERY helpful is about cutting the biscuits from the dough.  He states clearly:  "Cut out biscuits with a 2-inch cutter, being sure to push straight down through the dough."   At first I wondered why he would be so explicit.   You quickly discover that this is to make sure the biscuit maintains that quintessential biscuit form.   Lesson learned Alton!

The rest of his recipe is available here.  Given it is his recipe you should read it ther

Now what have I changed...

Well for one the baking powder.   I use double acting baking powder and let the dough sit for like 5 minutes after I assemble it.  I do this to get the biscuit nice and fluffy and tall.   Now Alton's recipe is fine but when you use the double acting baking powder and let it set for a few minutes the biscuits come out HUGE.  I love me some huge biscuits :)

The second thing I change is I have changed is I love a little bit of cheddar in all of my buttermilk biscuits.   I feel like the bite of the cheddar really plays well with the buttermilk.  This comes to life especially well in the aftertaste.  Now I dont use alot of cheddar as I am not making cheddar biscuits.   I grate like an eight cup of cheddar cheese and fold it into the dough.  Now because you add in cheddar I reccommend putting in a tiny extra pinch of salt than Alton uses.  This is to blend the flavors a bit.   More ingredients more salt.

The last thing I add is a small pinch of cayenne.  Nuff' said.   Mmmm Heat.

What you get is a tall, tasty and wonderful lil buttermilk biscuit.   Mmmm Yummy.


MMM BUTTERMILK BISCUITS


Pizza Dough!

Being a native Brooklynite I am QUITE passionate about my pizza.   Pizza has been a part of my life for as long as I can remember.  When I was a kid I would walk home from school and get a slice and a soda at Smiling Pizza in Brooklyn.   When I was in high school L&B's Spumoni Garden was the place to be and BTW has the BEST square slice of pizza in Brooklyn.   If anyone feels differently about L&B's I got one thing to say...  However, I will bite my tongue because this blog is classier than what I got to say.

When I was in college I would drive to Howard Beach to go to NEW PARK Pizza and grab a plain slice.  NEW PARK's plain slices are pretty amazing.  If you disagree with this read what I said about people who disagree with my opinion on L&B's....

So one might ask the question... "Why haven't you really tried to tackle pizza on your food blog?"   The answer is quite simple...There is no pretty good pizza.   There is GREAT pizza, regular pizza, and fake pizza like Dominos, Imos, and the pizza casserole known as CHICAGO PIZZA.   Now I don't want to start a fight so I will leave Chicago Pizza for another post but come on chitown it is a pizza casserole not a pizza.

Since i <3 pizza and am proud of my cooking, I have NOT tried to really make my own.   Trying to build a good pizza is like trying to climb mount everest.   If you don't have a sherpa, you aint making it up.    Since I don't have a pizza sherpa I have always avoided trying to make a true BROOKLYN pizza pie.

Well I still dont have a sherpa but the time has come to give pizza making a try.  I am now officially trying to work on building my pizza skills.   It will take me years to develop proper pizza skills but the mission has begun.

I am starting to feel comfortable sharing the progress of this work so here goes....

My first new york pizza I am willing to share is a basic pepperoni pizza.  Here is a the shot of it:


The pizza dough was the starting point for me.   Brooklyn pizza is what it is because of the dough.   I need to start my journey with a base recipe so I am going to use the About.com recipe I found.   While this is a recipe that I doubt will turn out the way I want it, it is a good start.   So here it is:

New York Pizza Dough Recipe from About.com


Ingredients:

  • 2 1/4 teaspoon (1 package) instant dry active yeast
  • 1 cup warm water (not hot!)
  • 1/2 tablespoon sugar
  • 3 cups bread flour, or as needed
  • 2 tablespoon olive oil
  • 1 1/2 teaspoon salt

Preparation:

  1. Add the water, yeast, sugar, and a 1/2 cup of the flour into a mixing bowl. Stir well and let sit for 20 minutes. It will get bubbly.
  2. Add olive oil, salt, and 2 cups of the flour, and mix with a wooden spoon until it's together enough to turn out on to a lightly floured work surface to knead.
  3. Knead for about 10 minutes, while adding more flour a little at a time, to produce a soft, elastic and slightly sticky dough. Do not add too much flour, just enough to keep it from sticking to the work surface as you knead.
  4. Form the dough into a ball and place in a large oiled bowl. Drizzle a few drops of oil and coat the top of dough to prevent the surface from becoming dry.
  5. Cover with a kitchen towel and place in a warm spot for 2 hours, or until the dough doubles in size.
  6. Punch down the dough and divide into 2 balls and place in large zip lock plastic bags and refrigerate overnight.
  7. When ready to use, remove from fridge, and let the dough come up to room temperature before using. 

This recipe was ok.   A few things I did not like:

  1. I didn't think the consistency of the dough was all that right.   
  2. The flavor was a little eh and needed some salt
  3. Texturally it needed a lighter internal texture and a crunchier crust
  4. It needed more than just bread flour
  5. I did not let it sit long enough to rise.  TIME IS YOUR FRIEND
  6. I dont have a pizza oven so it doesn't cook quick enough
As per the marinara sauce I used my basic marinara sauce:

2 large can of crushed tomatoes
red pepper flakes
4-6 cloves of garlic
1 sweet onion
1 large shallot
salt
pepper
olive oil
herbs (basil, oregano and italian parsley)
1/4 cup of parmesan cheese

The trick to a good marinara is time time time...  TAKE YOUR TIME and go low and slow on the cooking.   Just sweat the garlic, onions and shallots.   Hit it with salt and pepper and add the red pepper flakes.   Put in the crushed tomatoes, stir it, add in the herbs and go low and slow.   Stir in the cheee and let it melt then season it to your liking. 

YUM

Anywho...  I need to invest my time in working on the dough.  I will give it a go once a month and see how my pizza making progresses.   The pizza I made was delicious and in time I will figure out how to make a great Brooklyn pizza.


Sunday, March 4, 2012

Simple Soba Noodles with Sesame Five Spice Tuna

There are days when you are craving flavor but you are also craving something simple.  On these days I look straight to Japan.  A place that has perfected quick, simple, super flavorful dishes.  

Last night I decided to use japan as my inspiration for a simple meal.  

I wanted to bring together a few key flavors as separate items on a plate:  Dashi, Soy Sauce, Mirin, Sesame, and Five Spice.  I instantly knew what i wanted to do!

I wanted to make something with Soba Noodles!  Soba Noodles are served with a Soba Dipping Sauce called Tsuyu.   Tsuyu is made with Dashi, Soy Sauce, and Mirin.   Three of the flavors I craved.  For those of you that don't know what Soba Noodles are, they are a buckwheat based noodle that is served cold.  It can be served hot in soup as well but I love it cold.   One of my favorite things about Japan was getting good food fast in the train stations.    Soba noodles were a big part of that.   

I wanted a light protein that was prepared simply with the Soba Noodles and that is when I decided on tuna.   My plan was to get a nice few pieces of fresh tuna and season them with chinese five spice powder that my lil sister picked up for while travelling in Thailand.   I wanted to add a layer of sesame flavor so I whisked together a marinade from tamarin sesame dressing, olive oil and chinese five spice powder.  I quickly pan seared the tuna on each side and let it rest.

I paired all of this with a simple salad with mixed baby greens, chopped purple cabbage, and chopped white cabbage.  I lightly tossed it with some of the tamarin sesame dressing and dinner was ready.

I plated it on some beautiful long plates that I have in the house and I was ready to eat!    Everything was so fragrant and delicious.  A simple meal, very flavorful, and a taste of Japan.  YUM


Total prep and cook time: 15 mins.

Amount of Delicious: AWESOME

i <3 japan

Thursday, February 9, 2012

Silly Social Ads

So recently I have become obsessed with silly social ads.    I am amazed by the amount of social "punch the monkey" kind of creative executions.

So with that said I am going to start posting my favorites

With that said here is the first few in my installation of silly social ads:

An automall that is trying to get people to like the object and decides to put a giant red heart as the image.   I am curious how many people even know what this is or care but just like clicking on hearts.  

Wednesday, February 8, 2012

Pork Chili Recipe That Will Make You Squeal!

So the day was Super Bowl Sunday 2012.   My NY Giants were gearing up for the game and I decided that I needed to represent and make some chili.  Nuffin' says luvin' like Super Bowl Chili.  I texted some people and got a lil Super Bowl event going on at my house.   It was time to go shopping and get my chili ingredients.

Since I called an audible on throwing a Super Bowl party I needed to get ingredients that would power up the flavor and maximize my time that I had to cook the chili.    It was 430pm and I was at the butcher.   Game time was 6pm and I planned on serving the chili at half time.   

Pork was the clear choice because it is such a flavorful meat.    I decided to go with 4 selections of meat for my chili:

6 pieces pork stew meat
1lb of Bork (part chopped beef and part chopped pork)
1 hunk of uncut butcher block smoked bacon
1 smoked pig foot.   Mmmmm smoked pig foot heh

So let us take some time to about why I chose the meat I chose.   

Well for one thing I wanted to have more then one type of meat texture so I decided to get the stew meat and the chopped meat.   The stew meat would be pulled and stringy which is wonderful.   The chopped bork would be the quintissential meat texture you expect in a chili.    

The bacon I am going to be adding at the end so let's move to the really fun ingredient...   SMOKED PIG FOOT...   Now the reason I picked up this ingredient was to really amp up the porkiness and smokiness of the chili.  But let's be honest....  it is a friggin smoked pig foot.   How could I possibly resist?!????


I mean look at that thing.  It is gorgeous and wacky all at the same time.    I needed to experience the power of the smoked pig foot.  I could need resist it's draw.  Mmmmm Smoked Pig Foot.   

So here was the other ingredients I got for the chili.   

1 hunk of beautiful aged cheddar cheese
2 tablespoon Thai chili powder
1 teaspoon Sichuan pepper corn
1 tablespoon Yellow mustard powder
1 teaspoon All spice
1 teaspoon Cumin
1/2 teaspoon dried chili flake
1 tablespoon of honey
2 large cans of crushed tomatoes
1 large yellow onion
1 large shallot
1 can of black beans
2 cans of butter beans
4 large cloves of garlic
some warm water
Kosher salt
Black pepper
pickled jalapeƱos
sour cream
olive oil

Given I was rushed for time I decided to use two pots.  One pot so I can stew the meat and create a base that is porky porky porky.   One pot to make a sweet and spicy tomato base.   Once I was satisfied with the flavor bases I would combine the two pots and cook it down to remove the moisture. 

Porky Pot:

First I seasoned all the meat with salt and black pepper.  I heated up the pot and put some olive oil on the bottom.   I dropped in the stew meat and started to sear it to create a nice browning on it.    Once it was nice and brown I dropped in the bork and browned that up.   I added in the mustard, nutmeg, all spice, sichuan pepper corns, and thai chili powder.   I coated all the meat in the spices and then dropped in the pork foot.   Mmmm pork foot.   I covered the whole thing with water so the pork was submerged in water but just enough to submerge it.    I started it simmering and let the meat go go go.   About 20 mins in I added in the can of black beans and about 45 mins in I removed the pork foot so the smoke flavor did over power the pork pot.  

Now I realize the sichuan peppercorn and thai chili powder are hard ingredients to find.  I suggest hitting up your local asian super markets or hitting up your local china town.   Either way they are worth the effort!  Super delicious and amazing flavor.   The sichuan peppercorn are amazing!   They make your mouth numb and taste like pink peppercorns kinda.   Yum Yum!  luckily I had someone pick me up these ingredients while in Thailand and um er um sneak em into the country.   hehe.


Sichuan Peppercorn


Thai Chili Powder


Sweet and Spicy Tomato Pot:

I cut up one yellow onion and one shallot.   I added olive oil to the pot and sweat the onion and shallot in the hot oil after seasoning it with salt and black pepper.   I added in the garlic and brought all the ingredients to a nice caramelized brown color.    I added in the two large cans of crushed tomatoes, the honey, and red pepper flakes.   I added in some seasoning of salt and black pepper and cooked all the flavors together.   I added in the butter beans and let it cook down for 45 mins.

Once the two pots were ready I combined the two pots.   I let this mixture simmer for the next hour covered.   I then removed the cover and let it simmer uncovered to let the moisture come out.  I shredded some cheddar cheese about 1 cup and folded it into the chili.

Once the chili was "ready" I started to work on two addon ingredients to plus it up flavor wise and texturally.  I cubed the butcher block bacon and cooked it up nice and crispy.  I made sure not to over cook it as I wanted the center to be a little gelatinous but cooked.  I wanted the bacon fat to burst into your mouth when you bit into it.  Mmmm Bacon.   I also cubed up some cheddar cheese.    

When I served the chili I folded in the about 10 cheddar cubes and 4 bacon cubes per bowl.   I garnished it with 6 more bacon cubes, some chopped pickled jalapeƱos and some sour cream.

What I got was simply delicious!   Smokey, porky, sweet, beany, super delicious chili.   This chili made we want to squeal.   This recipe has some unique ingredients but this is by far the best chili I have ever made or eaten.   Yum yum yum!

Here is the final product:


Thursday, November 24, 2011

My Perfect Thanksgiving Day Authentic Puerto Rican Pernil Recipe

So if you have read this blog over past holidays you know that I am obsessed with cooking pernil for the family.    Pernil is the quintessential holiday roast from the Puerto Rican side of my family.   I LOVE PERNIL.    Garlicky, salty, porky goodness.    YUM YUM YUM

You can witness my obsession with pernil recipes by visiting my Pernil Pork Party.

Ok ok ok.   So over the last few weeks I have been experimenting with ideas for a better pernil recipe than what I put together last year.   I have been messing around with the brine, the cure, the timing of brine and cure, and a custom injection for the pig.

The recipe I developed this year ended up being the best pernil recipe I have ever come up with.    I have maintained all the authentic puerto rican essentials while applying a few tactics to dial up the flavors and perfect the crispy chicharron.

Ok so without any further notice here is my perfect pernil recipe for pernil al horno....

Lets start with the meat.   Get a nice 9lb picnic cut pork shoulder.  It's the perfect meat for pernil.    The better the pig the better the pernil.   Go for the good stuff and get it from your local butcher.    The picnic cut is the lower part of the shoulder as depicted here in this cool butcher pic:


The next step it to prep the meat by scoring the skin with nice long and deep lines across the skin as seen here:

My Tio Benny taught me this scoring technique.    In Cocina Criolla (the best Puerto Rican cook book) it tells you to score the skin with diamonds.    The lines going across the back of the skin from one side to the other is way better.   When the chicharron crisps up it ends up being little chicharron candy sticks.   It is awesome.   Crispy, salty, sticks of pork skin.  YUM

Now it's time for the flavor.  Pernil is all about the flavor.   For pernil al horno the authentic ingredients for flavoring are:

oregano
cider
black peppercorn
garlic garlic garlic
salt salt salt salt :)

You will see this ingredient combination over and over again in my recipe.   It is the foundation of the pernil flavor and an absolute requirement for an authentic pernil.

The first flavor step is the brine...   Here is my perfect pernil brine recipe:

Pernil Brine Recipe:

6 bay leaves
3 stalks of oregano
25 mixed peppercorns
2 halved heads of garlic
16 cups of water
3 cups of salt
2 cups of sugar
A healthy sprinkle of Goya Adobo 

I left it in the cold brine for 24 hours sitting in the frig.   Once that was done I removed the pig from the brine and dried it off in preparation of the marinade/cure.  


Here is my recipe for the perfect pernil marinade/cure:

(Designed for a 9lb picnic cut pork)

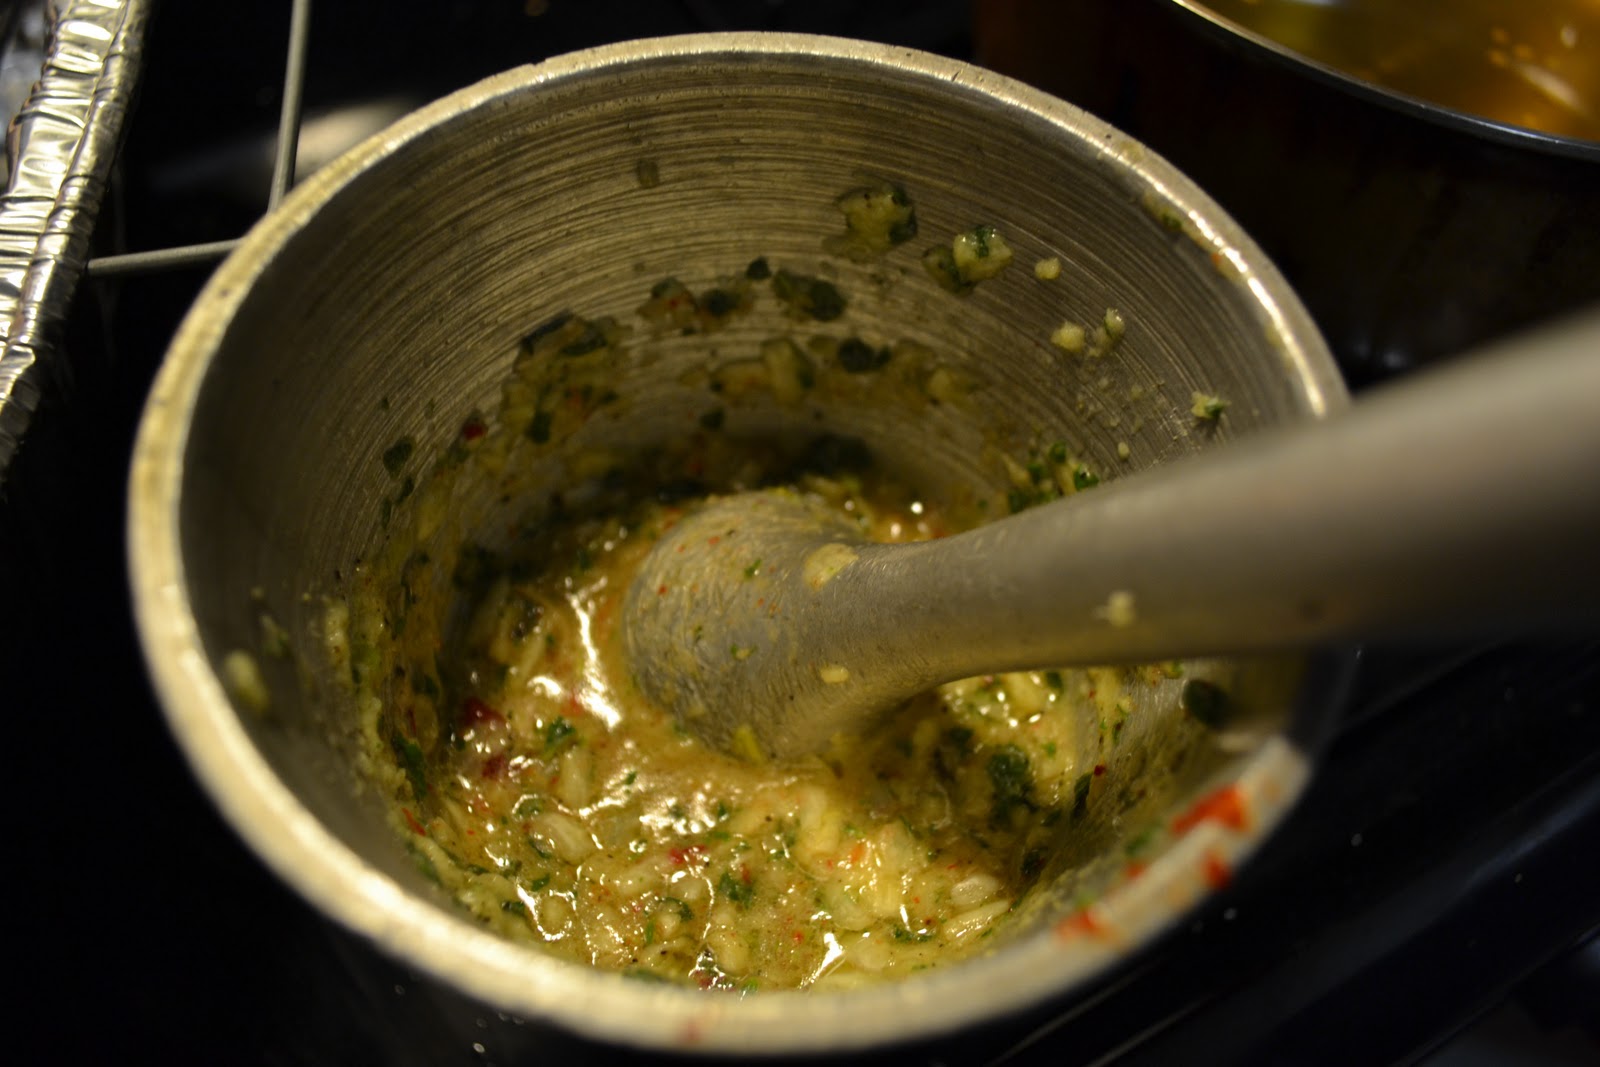
With a mortar and pestle mash up the following:

15 cloves of garlic
2.5 tablespoons of fresh chopped oregano (a couple fo sprigs)
16 black peppercorns
12 teaspoons of kosher salt
the meat of 2 reconstituted new mexican drilled chillies

Once that is mashed up add in the following and mash it up some more until it is a nicely integrating marinade/cure

2 1/4 teaspoons of cider vinegar
2 1/4 teaspoons of olive oil

Rub down your pig with 2/3 of the marinade.   Get the rub all over the pig.   Every inch must be coated in it.    Stab the pig with a long knife to make some deep cuts in the pig that are about big enough to fit your finger in them.   Shove the remaining marinade/cure into these holes to ensure you are infusing the flavor into the meat.

Here is a pic of my marinade and my pernil after I applied the marinade/cure


Once that is all done cover it up and stick it in the frig.   Don't touch it for 3 whole days.   The longer it sits the better.  I like 3 days.

The next step is the injection.    I whip up a quick injection by making a soup from the following recipe:

2 roasted garlic heads (45 minutes in the oven at 400)
8 black peppercorns
2 sprigs of oregano chopped up
pinch of salt
splash of cider vinegar
1 cup of water

I boil it and then strain it out so I have the liquid only for the injection.   Prepare it the night before you want to cook or put it in a quick ice bath the day of to cool it down.  The injection must be cool.

Take the meat out of the frig 30 minutes before you cook it and inject about 3 injection needles worth of the soup mixture.   This gets more of the essential flavor into the pernil and also makes sure it is nice and juicy.

Preheat your oven to 350 degrees and stick the meat in for 35 minutes for every lb of meat.   Make sure it is covered.  About 45 minutes before its done take off the cover.   In the last 10 minutes turn it up to 450 and get that chichiarron nice and crispy.

What you get is friggin amazing.   Pure deliciousness.   The perfect pernil!


SALTY
GARLICKY
YUM YUM DELICIOUS!
THE PERFECT PERNIL

Sunday, November 6, 2011

Gumbotto Recipe - My Rendition of a Gumbo Inspired Risotto

The other day I was watching Food TV and gumbo was featured a few times.   It was the day of Snotober in the NYC so I figured that I wanted to do something warming like gumbo for dinner.    Sadly then two shows later Food TV did something on risotto.  I wanted to make that as well!   It then hit me to try to make a gumbo inspired risotto.

Now I know there are plenty of recipes for Gumbo Risotto but I just wasn't in the mood for the tomato base.  I decided to just take the key ingredients I like of gumbo and incorporate it into some form of seafood risotto.   So here is what I came up with:

Ingredients:

2 andouille sausage
4 diver scallops
6 tiger shrimp
2"x1" block of slab bacon
1 salmon fish head
1 extra large shallot
1 yellow onion
4 cloves of garlic
bunch of fresh cilantro
chili flakes
4 cups fish stock
4 cups of water
2 pinches of paprika
1/2 stick of butter
2 cups of risotto rice
kosher salt
cracked black peppercorn
half of a fresh lemon
some parmesan reggiano
olive oil

Here was the plan.  I wanted to make my own fish stock base by putting a fish head in 4 cups of water and bringing it to a boil.    I removed the fish head and add 4 cups of store bought fish stock to it.   Whamo!   Fresh fish stock sorta.

I must admit the kid in me was excited to just be messing with a fish head :)


lol.

I then uncased the andouille sausage and cubed the bacon.  I tossed the andouille and bacon in the sautee pan with olive oil and made sure the sausage was brown and the little bacon cubes were nice and crispy.  I seasoned that to make sure the flavors come together.  Once the meat was done I took it from the pan and set it aside.   I added the shallots, garlic, and chili flakes into the sautĆ© pan in the meat grease.   A little bit of seasoning to bring it together.  Once they were lightly sweated I tossed in the risotto rice and lightly toasted it for 2 mins.  I deglazed the sautĆ© pan with two ladles of fish stock and began to work the risotto.

Good risotto is "worked."   You ladle in more and more stock and in between ladles you are tossing and moving the risotto.   When you do this the rice releases its starch and the risotto comes together much much more creamy.   "Working risotto" is a bit of a trick you need to practice and learn but once you hit your stride.  But when you do hit your stride you get AMAZINGLY creamy risotto.   This is why risotto is a comfort food....  it is made with love and care.

You work anywhere between 8-12 ladles of stock in to make a risotto.   You add some parmy cheese into it about 2x while you are working it.  Add enough cheese to add flavor but dont overwhelm it as you are going to put some cheese on it at the end.  You really got to make sure the risotto has the right creaminess and right texture.  This just takes practice!

I then heated up another sautĆ© pan and dumped in the butter.    I tossed the scallops and shrimp in salt, pepper, paprika and a bit of fresh squeezed lemon.  I tossed them in sautĆ© pan and spooned the hot butter atop them.    The shrimp I cooked to just done and took out.   I let the scallops get that perfect brown crust to them and took them out nice and done.   You really got to be careful not to overcook the scallop and shrimp.    The get rubbery if you over cook them.   This also takes practice.

I then finished the risotto by folding in som fresh chopped cilantro, the cooked andouile sausage and bacon.  

I plated the risotto down first with and on top of it put a bit of fresh parmy cheese and fresh cilantro.  I then added the scallops and shrimp to be served along side of it.

What I got was simply delicious.    It had the flavors of gumbo that I was graving and the risotto I was seeking.  Yum Yum Yum.   I have never made the gumbo risotto recipes that are online but let me tell you that this Gumbotto is worth making.

YUM YUM GUMBOTTO

Sable Kitchen and Bar (Gastro Lounge) - Heather Terhune's Vision in Chicago

Recently my favorite hotel the Hotel Sax was all booked up in Chicago for one of my business trips.  I love this hotel because of one and one reason only... BIN 36 :)  A great restaurant in Chicago I have come to frequent.   Their egg breakfast sandwich is definitely up there as one of my favorite restaurant egg sandwiches!  They also serve Grayson cheese which is stinky stinky goodness.

Instead of the Hotel Sax I booked my stay at the Hotel Palomar.  When I checked in I noticed a place called Sable Kitchen and Bar that described itself as a "gastro-lounge" on the first floor.   Now I usually don't really enjoy the term "gastro" being used to describe a bar or lounge.   It just seems weird to me and it is a carry over form England where the standard pub grub almost has a mandated pub fare menu.  I feel like most "gastro pubs" just need to call themselves a restaurant and bar.  Gastro this and gastro that is a recent trend.  To be quiet honest I feel like describing a place I eat as gastro is just trendy and not meaningful in any way shape of form.  I mean gastronomy means "the art and science of food eating."  No duh if I am in a restaurant.  Why is there a need to describe a place with it?!??

Anywho!   "Gastro Rant" done....

Sable listed themselves as a "Kitchen and Bar" so despite some mention of the "gastro lounge" term I decided to give it a shot for balancing truth with trend :)

Now I had heard nothing about Sable and just discovered it out of convenience but it was clear to me that this place was either popular or trendy.    The place had a good amount of people in it and by 7pm getting a table or seat at the Kitchen or the Bar was kinda tough.  Luckily the Hotel Klimpton was kind enough to ensure I got a table at Sable to sit and eat as a hotel guest.

When I was seated the waiter handed me the menu and described it as "American Fare with a twist" and sat me right next to the exposed and on display kitchen.  I LOVE when restaurants put the kitchen on display.   I love seeing kitchens put out food and watching all the deliciousness come together.

The waiter explained that almost everything on the menu can be enjoyed as a full or half serving.   This was first signal that I was going to enjoy my meal.    Any place that advocates for smaller portions so you can order more things has a special place in my heart.   I mean tapas and sushi have been tremendously successful for a reason!  

I picked up the menu and my excitement started to build.   The menu was clearly something that they update seasonally and almost every item on the menu looked like something delicious, and creative or thoughtful.   The key to a good menu!

My eyes settled on something I was 1000% going to have to order as my appetizer...

Wisconsin Fried Cheese Curds with Spicy Ketchup Glaze

Ummmm....YUM (!&@#

I friggin love when people put cheese curds on the menu and serve them in some melty form.  They are one of the perfect cheese vehicles for melting as they are all different shapes and sizes so each curd is a different level of melty.   I love when people serve them and Sable is serving them deep fried and with spicy ketchup.   I HAD TO HAVE THE CURDS! !*(@&#(

The Wisconsin Fried Cheese Curds (I really cant say that enough) showed up and I attacked it!   I slipped into a melty fried cheesy heaven and didn't look back.   This thing was so amazingly delicious.   I won't go into too much detail but will say the following six words about this dish:

WISCONSIN
FRIED
CHEESE
CURDS

SPICY
KETCHUP

I mean I think that about covers it.   Oh and if you have never eaten a cheese curd dont wonder about what it is or isn't   It's just a piece of fresh cheese in it's most simplistic form.  They are yum.

Here is a pic of this delicious dish as the presentation was also spot on.


It was served up in a little basket with parchment paper which reminded me that I fried em.   This is the perfect way for someone to serve up fried food.   REMIND ME you fried as that is was I ordered it.  Xoxo Sable.

I also order a half portion of the Moroccan Spiced Almonds.   A simple and delicious dish.   Almond slightly coated in what I think was Ras El Hamout.  A great spice and a great nut.   You simply can't go wrong.   If you haven't tried this spice mix I definitely recommend it.    Vibrant, earthy, spicy and delicious!   Put it on some crunchy nuts and you win my heart :)  Once again Sable I am impressed.

At this point in my meal I wanted to meat the Chef.   This is someone who clearly knows their food and someone who also clearly enjoys their food.    I learned that the Chef behind sable is someone named Heather Terhune who I discovered is now appearing on the latest version of "Top Chef."   This is going to be a good meal.  Not because she is on TV (as most celebrity chefs are proof to the opposite) but because she is recognized and based on my first two dishes she is someone with alot of talent.  Oh Heather Terhune you are making my belly smile.   What did you have in store for me as an entree?!???

I picked up the menu again and began looking for my entree selection.    Winter has started to roll in so I was definitely looking for something that screamed winter is coming winter is coming.    I eyed my options and one stuck out as the one for me:

Grilled Venison with sweet potato, bitter greens, and a cranberry gastrique.

Um Yes!

Venison is one of those meats that screams end of fall, beginning of winter, family feast meal option.   Venison has a very special place in my heart as one of the chefs in my family always serves it for the holidays and it makes me think of family.   It is amazing how much our perception of food is influenced by how we are introduced to it.

My venison came and it was quite a beautiful plate.    Brown, Green, Orange, and Red.   I felt like I was staring at a plate of fall goodness.    Once again the presentation was impecable.   I prepared my first bite with a little bit of everything and layered it onto my fork the same way the chef layered it onto my plate.    Sweet potatoes first on the fork, greens second, venison on top and a dip in the cranberry gastrique.

I took a bite and I can only describe it as "right".   You first get the sweetness of the gastrique followed up by the silky goodness of the sweet potato.  Then you get hit with the venison game yum and it finishes with the bitter greens breaking through and rounding it out.   This was absolutely and undeniably delicious.   This is one of the most balanced and delicious plates of foods I have had in recent times.   Perfection on a plate.   Oh Heather Terhune how I now am becoming a huge fan of your food.


I finished up my entree and began to now dream about dessert!  I was in the mood for fall so I was hoping that the menu Heather put together for dessert had also been modified to reflect the season.   Low and behold it was!

I ordered the pumpkin panna cotta with candied pumpkin seeds and ginger bread cookies as my dessert with an espresso with lemon.   When I got the dish I wasn't quite sure how the chef intended me to build the perfect bite based on the plate.   I first tried dipping the cookie in the panna cotta and put pumpkin seeds on top.  This was delicious but it wasn't as complex and amazing as my previous dish.  I had to be doing something wrong.   My next bite I took a spoonful of the panna cotta with pumpkin seeds and stuck it in my mouth.   I finished it with a bite of the ginger bread cookie and suddenly the dessert began to make alot more sense.   The panna cotta was delicious and had wonderful texture but as all panna cottas are it needed something to keep me interested.   When I took a bite of the ginger bread cookie after the bite of panna cotta the peppery deliciousness of the ginger really came through.  It cleansed my palette and made my tongue feel like it was having a party.   This kept me eating and made the dish so enjoyable.

All in all sable is an amazing restaurant that puts out an amazing product.   The Palomar hotel better understand what they have going for themselves with Sable being a part of it.  The hotel was nice but I will book myself there again for the simple fact that I will get to eat at Heather Terhune's Sable Kitchen and Bar.

Next time you are in Chicago make the effort and go to Sable.   You will not be disappointed!

Thursday, October 27, 2011

Stupid Social Efforts - Step Up Brands and Step Up Facebook!

So as I learn more and more about facebook and how to work it to gain value from it as a brand I am noticing some really stupid things going on. 

So here is the deal.  If you want to maximize your investment on facebook you need people to interact.   It is how their algo's work for the news feed and such.  They look at the objects you "create" (a brand's programmed content) and if people interact with the object then it helps every other future object they program as it gets better coverage in the news feed. 

Well that is great but that doesn't mean a brand should do stupid things like this:


How on earth does this promote a brand?  This is friggin noise.  What are brands doing and why would facebook allow content like this to be pushed into their platform?   It is creating noise.  It is annoying and doesn't make we want to include the brand in my news feed AT ALL.   
I get that you want to maximize your investment and gain the "earned" impressions but the key is "earned".  If you say silly things you become non relevant.  

Time for brands and facebook to step it up!

Wednesday, October 26, 2011

Apple Pie with A Cheddar Crumble

So recently I have been getting more and more into baking.    I have been traveling a lot so I have been enjoying baking because it allows me to leave some "goodies" behind when I take off for my loved ones.   Pie has been a particular focus for me as I friggin love pie.   Mmmm Pie.   hehe

Anywho!

I have made a couple of apple pies in order to lock into a REALLY great recipe.   I am not there yet but I wanted to start to share some food pics of some recent "wins" with my apple pie recipe hunt.  Specifically it is an apple pie with a cheddar crumble and it was DIVINE!   YUM YUM APPLE PIE!

The Finished Pie Untouched :)


The pie cut open.   YUM

Monday, October 17, 2011

Wednesday, September 21, 2011

Benton Park Cafe - Review

Today I flew into St Louis to attend some meetings.    I got here a bit early so I went down by the AB brewery and decided to go grab myself some breakfast.    I was looking for someplace close by and that was about my only criteria for a place to eat.  I checked google maps, found a spot and off I went!

I stumbled into a place across the highway from the brewery named Benton Park Cafe.    It looked like a cute spot so I started to get excited that it might just be great.    They had some outdoor tables and it seemed like a young but homey kind of spot.

When I first walked in I was greeted with the following sign:


Now being a NY Mets fan this made me laugh a little bit.    I had no idea until a few years ago but apparently the city of St Louis calls the NY Mets pond scum.   Pond scum was something from the 1986 series when the Mets took the world series.  Some local sports dude coined it and it stuck.   Of course this made me giggle.  We NY Mets fans are a proud bunch but this just makes me smile.    :)  Oh and St Louis....We might be pond scum but we still one the year you coined the phrase :) xoxo

Anywho I disgress.

The place looked awesome.   It was quiet cool and definitely seemed like a spot I want to start my morning with over breakfast and end my night with for a drink.   Spots like this are my fav.   The wait staff seemed cool so we sat on down and were ready to eat.   Based on the look of the place I began to have high expectations for the coffee and food.   It really looked like and smelled like this place was the real deal.  A place that cared about their ingredients, recuperation and recipes.   This is key for me.  Any creative force knows your idea is as strong as the thought and care you put into it.  This place looked cared for!

The staff was super friendly and all young and fun seeming.    Though I might of been dressed in a suit underneath is tons of ink and a sprinkle punk rawk.   My true me felt at home in this spot.

I ordered an iced latte and waited now with high expectations.   In the meantime I checked out the menu.   The menu looked amazing!   One thing on it really called out to me.  It was called the BP Slinger....

Here's the description:

Beer biscuits, cheese, bacon, over easy eggs smothered in their house made gravy.  

Um Yum.....So I ordered it.   When it came out it looked pretty amazing.   I posted a shot of it with the egg broken so all can see :)

I broke the egg and took my first bite.  So how was it you ask?   Allow me to summarize in a few key words:

*&!@# AMAZING

First off their gravy is just plane godly.   The gravy has a kick to it so it made my mouth tingle with joy.  It was the perfect flavor balance too.  The gravy was porky goodness without making me feel like i ate a bucket o'lard.  The consistency of the gravy was the best I have ever eaten.   This is quite possibly the best "breakfast" gravy I ever have tasted.  Thoughts of bathing in the gravy, living in the gravy and other such delusions entered my head as the gravy goodness bounced around in my mouth.

But wait....They needed to do more...Having quite possibly the best gravy I have ever eaten was simply not good enough for these guys so they chopped up crispy bacon and put it in the gravy.   (&!*@#   WHY HAVE I NEVER THOUGHT OF DOING THAT?!??!??   Bacon chunks in gravy.  OMG YUM.

The put this 7th wonder of the world gravy on top of a perfectly cooked egg and a biscuit that was simply delicious.

After literally destroying my plate of food and having to hold myself back from ordering another plate I got the chance to talk to some of the wait staff.   They were social, friendly, and just plain chill.

So...What's the lesson here all?

IF YOU ARE ANYWHERE WITHIN 500 MILES OF ST LOUIS GO TO BENTON PARK CAFE.   Order anything with the biscuits and gravy.   I am seriously making Benton Park Cafe a regular go to spot when I come to the STL.

Benton Park Cafe = Awesome
Benton Park Cafe Biscuits and Gravy = A 100% MUST EAT...

YUM! 

Sunday, September 18, 2011

Lake's Edge Blue Goat's Milk Cheese Review

While walking around Brooklyn I passed one of my favorite shops "BKLYN LARDER."  They had a sign that read "VERMONT CHEESE SALE."  I could not resits.  I mean any sign that says Cheese + Sale is going to get my attention.  

I stumbled inside and decided to take a look at the selection of cheese from Vermont.   I ended up selecting a cheese called Lake's Edge Blue Goat's Milk Cheese.    I was in the mood for something creamy and light and this cheese looked like it fit the bill!

I brought the cheese home and decided to dive right in.    The cheese was amazing!  It was tangy, creamy, and had the essence of ash in it.   This was a truly delicious cheese!   If ANYONE runs into this cheese out in the market do yourself a favor and pick it up.    I am defintly going back to BKLYN Larder to go get myself some more!


Grilled Stickies! A Sinfully Sweet Pennsylvania Treat

On a recent trip to chitown a friend told me about a sinful treat that she loves from Pittsburgh.  The treat was called "Grilled Stickies."  When I heard the name I HAD to learn more.  I mean anything that is grilled and sticky can't be too bad!

She described them to me as a sinful french toast esque treat served with ice cream and caramel.   I HAD TO LEARN MORE!!!!!

I looked them up online and what I found was disturbingly delicious sounding!  Grilled Stickies are day old sticky buns that are sliced into 1/2" slices that are buttered and grilled.   I was sold.  I had to make em!

I ran to my bakery and got some sticky buns.   I picked up some sweet condensed milk and some vanilla ice cream and the Grilled Sticky party began!

Using sweet condensed milk to make caramel sauce is super easy.    I combine 4 parts sweet condensed milk and 1 part water and just whisk it while on low heat.   It turns into a nice thick caramel sauce.  YUM!

I applied clarified butter to each side of the 1/2" slices of Sticky Bun.   I put butter on a skillet and set it on low heat.   I put the slices of sticky bun on the skillet and browned each side.  I plated them with a scoop of ice cream and drizzled my caramel sauce on top.  YUM!

What I got was silly, stupid, absurd and delicious.   Grilled Stickies are AMAZING.   BEWARE THOUGH!  They are heavy!   This is definely a treat that should be enjoyed every once and a while.

Mmmmm Grilled Stickies!

Check out the pics:


Wednesday, August 24, 2011

Facebook + Ticketmaster = Great

So question....What is one of the most social activities in the world?  Entertainment!  No duh right?   Well facebook and tickmaster seem to be capitalizing on that is a pretty brilliant and simple way.  Consumers can now buy tickets in a way that is informed by the facebook social graph.  

Simple...Elegant...Brilliant!  Way to go Facebook and Ticketmaster!

Check out the link on mashable

Thursday, August 18, 2011

My Best Ever Steak - Yum!

Steak is something that I think ever single male begins their cooking journeys with.   Despite the fact that we start with it the fact remain that getting it right it actually something you have to spend a lot of time working on!

Steak is quite the obsession of mine and I have tried lots of different things.    In these trials I have begun to lock into a formula for success.   My formula is quite simple:

Good Ingredients + Time + Accuracy + Patience = YUM


So why don't I talk about the ingredients first....

1 Dry Aged Steak Sirloin Cut (Dry Aged = FLAVOR and is WORTH the cash)
Black Truffle Infused Olive Oil
Butter (The fat of the gods)
Garlic Powder
Salt
Black Pepper
Soy Sauce

One of my first steps is the rub.   I use a very simple rub that is garlic powder, black pepper and a pinch of salt per side.  I rub down the steak in this and then move it to the refrigerator.   This is where TIME really becomes important.   I like to leave my steak in the frig for about an hour and then take it out of the frig one hour before I cook it to allow it to come to room temperature.   Rushing this step of it will only result in a sub-premium product.  DONT RUSH THIS!!!!!

I then move to making a savory fat mix.   I melt some butter about half a stick and combine it with 2 tablespoons of truffle oil and one tablespoon of soy sauce.    The more premium soy sauce the better the flavor.   I use a black aged soy sauce.

I set my oven to 400 degrees and then get a skillet heated to medium high.  Once the pan is nice and hot i toss in the fat mix after giving the steak one quick coating of it.  It will start to bubble and spit and be ready for a little smoke to come up.

I then toss the steak in the pan with the bubbling hot fat mix and let it sit on one side to achieve the perfect sear.  The sear is a very step.  It helps keeps the steaks juices in but also really makes your steak look BEAUTIFUL.   Eating is about all senses.   Don't neglect beautification!  Also don't always check your steak!  Let it sit for 5-6 minutes and get that sear.   Patience and time are your friends.

While working to achieve the perfect sear I tilt the pan and get some of the bubbly fat spooned onto the top of the steak.   Once the sear is right on the bottom side  I flip the steak an then move the pan to the oven.

Now how long you leave your steak in the oven is all about how you like your steak cooked.   I like Medium to medium well so depending on the size of the steak I leave it in their for 8-12 minutes.   Size matters in how long you leave it.   I use my tongs to check how "firm" the steak is by pressing into it and that always help me really nail the time perfectly.

Once you are happy with how long its been in the oven take the steak out and let it rest for 5 minutes and let the fats redistribute themselves throughout the meat.  Slice the steak and make sure you are working with the grain of the meat and not against it.   Once the steak is sliced hit it with a slight pinch of salt to button up all the flavors and VOILA!

The soy sauce and truffle oil bring a earthy umaminess to the steak.   The garlic is straight savory and the meat stands on it's own.   Nothing over powers and they all work to make it beefy beefy goodness.   I call this steak recipe my bubble gum steak recipe because if they made steak flavored bubble gum I would want it to taste like this :)


Here are some of the pics:


Steak Cooking

Steak Cooked

Steak Sliced #1

Steak Sliced #2


YUM YUM STEAK!